

Async Script Loading
Consent Pro supports loading scripts asynchronously to ensure your website performance is not impacted by consent management.
For how consent management relates to site performance, see Performance & Privacy.
Overview
By default, Consent Pro blocks third-party scripts until user consent is granted. When consent is provided, blocked scripts are loaded asynchronously to avoid blocking the main thread and degrading page performance.
How It Works
- Script Detection — Consent Pro scans your page for third-party scripts and categorizes them based on your configuration
- Script Blocking — Scripts that require consent are prevented from loading until the user grants permission
- Async Loading — Once consent is granted, scripts are loaded asynchronously in the correct order
How to use async
1. Enable Load Script Async
Go to Banners > Global Settings and enable Load Script Async, then click Save Changes.
.png)
2. Copy the updated script and replace it in Webflow
By default (async off), Consent Pro installs as two separate script tags — a small config script followed by the shared runtime script:
<script src="https://api.consentpro.com/v2/cdn/runtime/config/..." finsweet="consentpro"></script>
<script src="https://api.consentpro.com/v2/cdn/runtime.js" finsweet="consentpro" siteid="..."></script>
Enabling async replaces both of those tags with a single combined tag that includes the async attribute:
<script async src="https://api.consentpro.com/v2/cdn/runtime/..." finsweet="consentpro" siteid="..."></script>You must update the script(s) in your Webflow site settings for this change to take effect — disabling async later works the same way in reverse (the one combined tag is replaced by the two split tags).
- Go to the Installation tab in Consent Pro
- Click the copy button to copy the updated script snippet
- Go to Webflow Site Settings > Custom Code and, in the
<head>section, remove the existing Consent Pro script tag(s) and paste the copied snippet in their place - Publish your site to apply the change
WARNING
If you skip this step, the script(s) on your live site will still reflect the previous setting regardless of what's configured in the app.
3. Scan and complete setup in the app
Before updating the scripts in the app, make sure your setup is complete in the app. This will ensure the trackers are detected, categorized, and filled with the necessary information for users. Go to the next step when you see the success message “You are all set”.
.png)
4. Update scripts, iframes, and images manually
We must be able to load or block scripts on your website based on a user's consent preferences. For Consent Pro to block scripts before the user's decision, you need to update each cookie-related script in your project.
Scripts:
Set the type attribute to fs-consent and add fs-consent-categories with the appropriate category value.
Example:
<script type="fs-consent" fs-consent-categories="analytics" src="https://example.com/analytics.js"></script>When you do that, the scripts will look disabled. This is fine and expected.
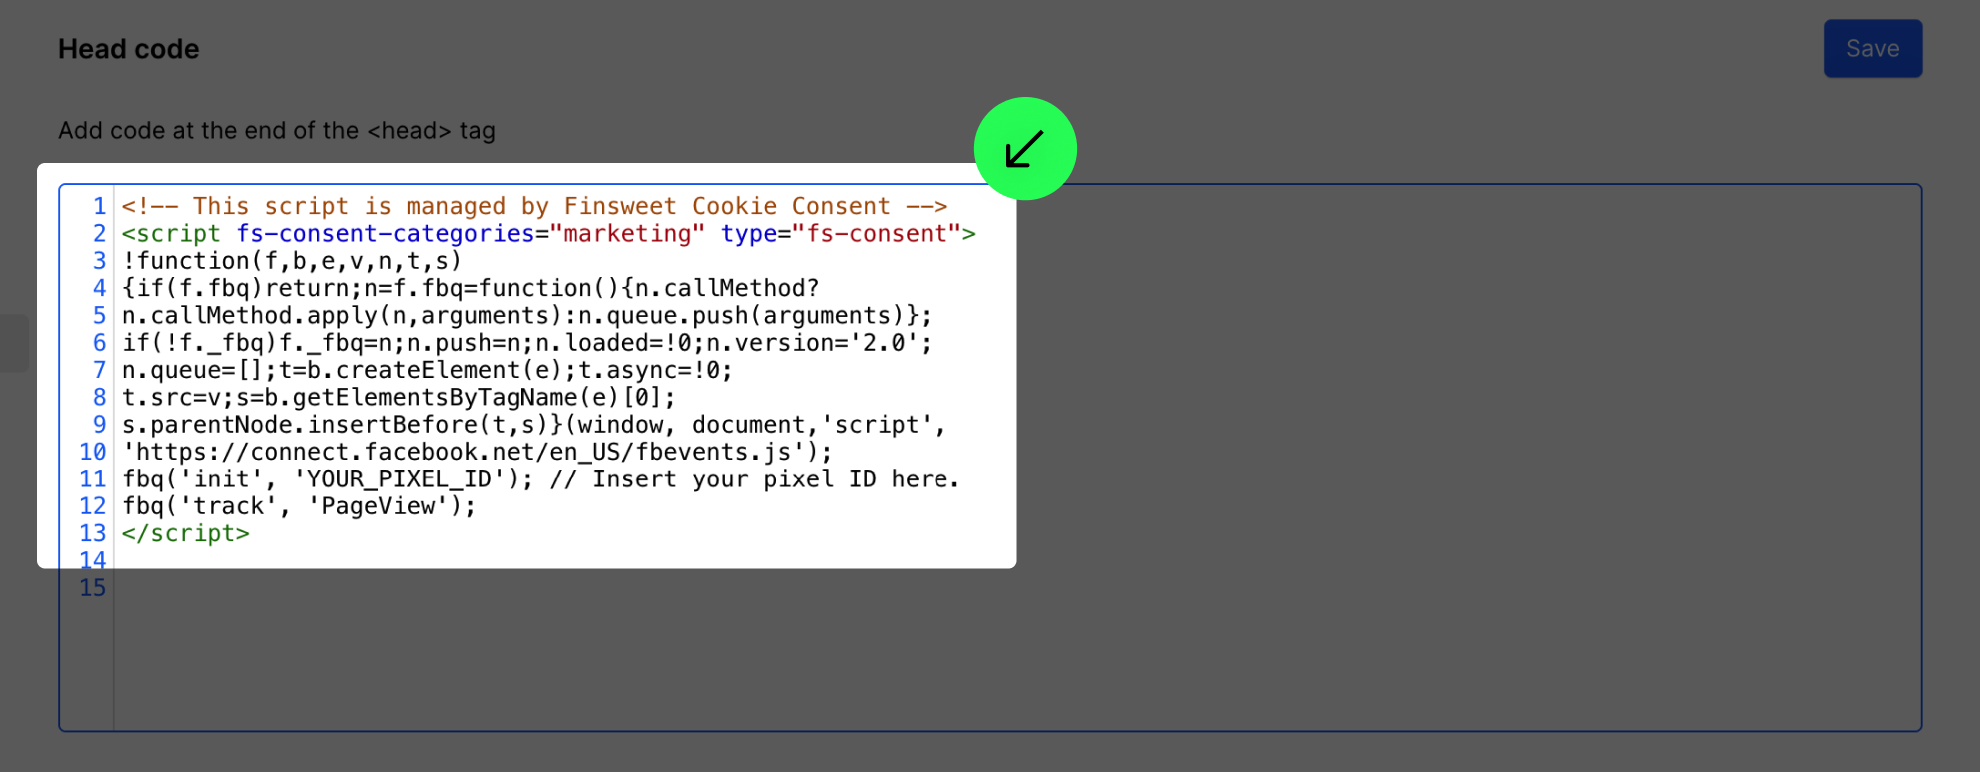
Iframes:
Replace the src attribute with fs-consent-src and add the fs-consent-categories attribute.
Example:
<iframe
  fs-consent-src="https://www.youtube.com/embed/dQw4w9WgXcQ"
  frameborder="0"
  fs-consent-categories="analytics"
  allowfullscreen=""
  title="Video embed"
></iframe>
Images:
Consent Pro can report third-party images that set cookies, such as tracking pixels or badges, so you can label them in the Manager. A live image src cannot be blocked — hold the URL in fs-consent-src with fs-consent-categories instead, and Consent Pro loads the image once consent is granted. See the dedicated Image Trackers guide for how detection works and a full walkthrough.
Category Reference
Set fs-consent-categories to the value that matches the type of cookies the element sets:
| Category | Value |
|---|---|
| Essential | essential |
| Analytics | analytics |
| Marketing | marketing |
| Personalization | personalization |
Elements marked only as essential are never blocked — they load immediately without requiring consent.
You can assign an element to multiple categories by separating values with a comma, the element will only load once the visitor has accepted all of the specified categories:
<script type="fs-consent" fs-consent-categories="analytics,marketing" src="https://example.com/script.js"></script>Callback Queue Pattern
Since the script loads asynchronously, use the callback queue pattern to ensure your code runs after Consent Pro is ready:
window.FinsweetConsentPro = window.FinsweetConsentPro || [];
window.FinsweetConsentPro.push([
  'consent',
  (FinsweetConsentPro) => {
    // Your code here, runs after Consent Pro initializes
  },
]);
Example: Load Google Fonts Based on Consent
A common use case is loading a custom font only when the visitor has accepted the personalization category. Place this inline script after the Consent Pro script tag:
<script>
  window.FinsweetConsentPro = window.FinsweetConsentPro || [];
  window.FinsweetConsentPro.push([
    'consent',
    (FinsweetConsentPro) => {
      if (FinsweetConsentPro.consents.personalization) {
        const link = document.createElement('link');
        link.rel = 'stylesheet';
        link.href = 'https://fonts.googleapis.com/css2?family=Roboto:ital,wght@0,400;0,700;1,400&display=swap';
        document.head.appendChild(link);
      }
    },
  ]);
</script>
Best Practices
- After toggling async on or off, always copy the updated script from the Installation tab and replace it in Webflow Site Settings — the number of script tags changes (one tag for async, two for the default sync setup) and the live site won't reflect your setting until you do
- Use the callback queue pattern instead of relying on script load order
- Place the Consent Pro script tag(s) as early as possible in the
<head>for faster initialization - When using the default (sync) setup, keep the two script tags together and in the order shown in the Installation tab — the config script must come immediately before the runtime script
- Do not use
deferon the Consent Pro script tag(s) — they must execute before other scripts are evaluated - Never combine auto-blocking with async loading — use the synchronous (non-async) setup for auto-blocking
- If in doubt about GDPR compliance, use the synchronous (non-async) setup — it guarantees no tracking scripts run before the user consents